Are you looking for a way to update your window treatments without spending a fortune? Do you love the look of roman shades but don’t want to deal with sewing or complicated hardware? If so, you might want to try this easy and affordable DIY project that transforms ordinary mini blinds into stylish roman shades.
A roman shade is a type of window covering that consists of a single piece of fabric that can be raised or lowered with cords. Roman shades create a soft and elegant look for any room, and they can also help block out light and heat.
To make roman shades from mini blinds, you will need:
Cut your fabric to size and fold over two inches on each side. Press with an iron and then hem all sides of your fabric using fabric glue. Set aside.
Lay the mini blind fully open on a large surface. Carefully cut the ladder strings that hold the slats together. Do not cut the pull cords that are thicker and run through the slats. You will need them to raise and lower the shade.
Next, pop off the plugs located on the bottom rod and set them aside. Pull out the pull cord and cut off or untie the knot. Then cut the cords to the length you desire, typically the length of the window plus a few extra inches for the knot. Tie a knot back in the cord and replace the plugs.
Then you will need to determine how many folds you want for your roman shade. Most articles suggest between seven to ten inches between folds. Measure your window and divide by the desired distance between folds. Round up to get the number of slats you need for your shade. The rest can be cut off and thrown away.
For example, if your window is 45 inches long and you want eight inches between folds, you will need six slats for your shade (45 / 8 = 5.63, round up to 6).
:max_bytes(150000):strip_icc()/diy-roman-shade-9-8907657e8a764b0a85f2ee8bc5f39aeb.jpg)
Place the blind on the wrong side of the fabric and measure the distance between the slats. Use a ruler and a pencil to draw lines on your fabric where you want the slats to go.
Apply a thin line of fabric glue along each line and press a slat onto it. Make sure to align the slat with the edge of the fabric and leave some space for the pull cord to run through.
Repeat this process for all the slats, leaving about two inches of fabric at the top and bottom.
Fold over the top edge of the fabric slightly to form a clean edge. Wrap it around the top bar of the blind and secure it in place with fabric glue.
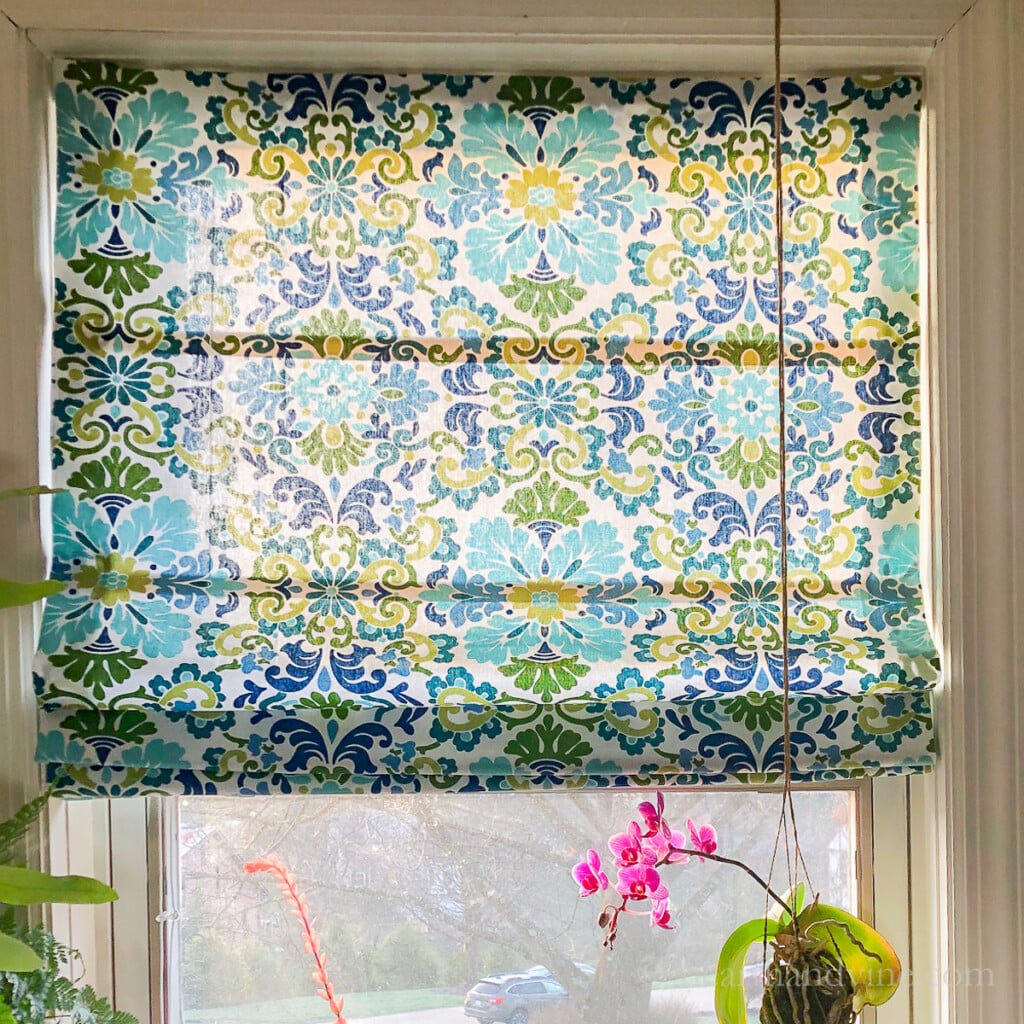
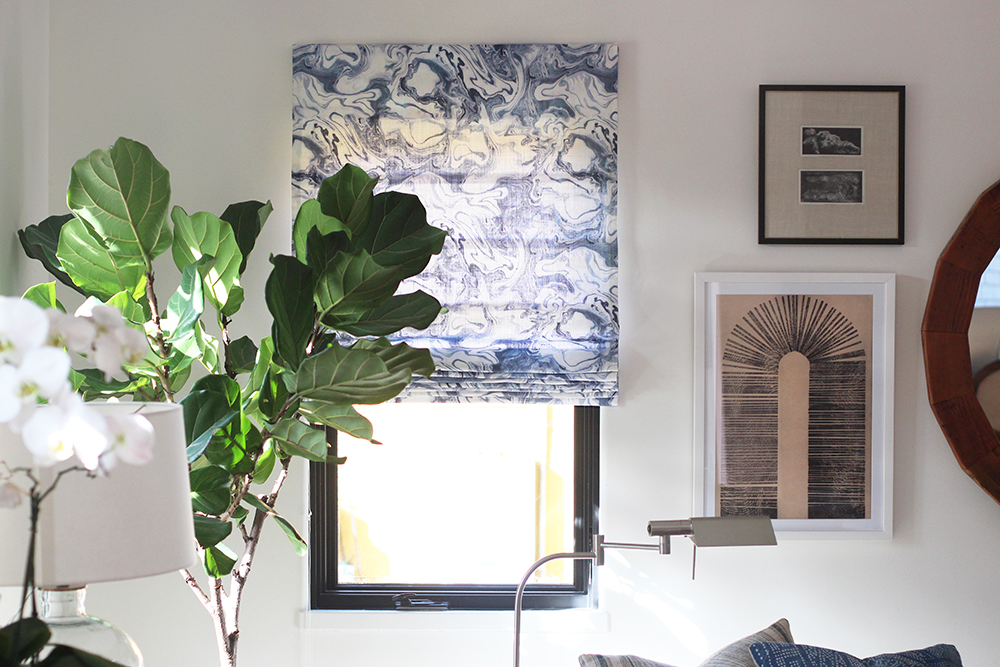
Hang your DIY roman shade as you would a regular mini blind. Pull on the cord to raise or lower it as desired.
Enjoy your new window treatment that looks like it cost a lot more than it did!

Q: What kind of fabric should I use for this project?
A: You should use a heavier-weight fabric that can hold its shape well and won’t fray easily. Some examples are duck cloth, canvas, denim, or upholstery fabric. You can also use lighter fabrics if you add a lining or interfacing to them.
Q: How do I clean my roman shade?
A: You can spot clean your roman shade with a damp cloth and mild detergent if needed. Do not machine wash or dry it as it may damage the glue or cords.
Q: Can I make this project with cordless mini blinds?
A: Yes, you can make this project with cordless mini blinds as well. The process is similar, except you will need to attach magnets or Velcro strips to each slat and fold to keep them in place when raised.
Making roman shades from mini blinds is a fun and easy way to give your windows a makeover without breaking the bank. You can customize them with any fabric you like and create different looks for different rooms.
If you enjoyed this DIY project, please share it with your friends and family. And don’t forget to check out our other home decor and lifestyle tips on our blog. We have plenty of ideas to help you make your home more huetiful!

Dale is the colorful mind behind HuetifulHomes.com, where he shows you how to create a home that is as fun and fabulous as you are. He has a passion for color and a knack for DIY, with years of interior design experience he shares his tips and tricks on how to create a home that reflects your personality and style. He believes that color is the key to happiness, and he wants to help you make your home more Huetiful.

