Here is a rewritten introduction for the blackout curtains article:Give your blackout curtains some TLC! While these cozy curtains block out light and noise, effectively cocooning your space, they still need regular washing to stay fresh.
But cleaning blackout curtains requires care to prevent damage or diminished effectiveness. Never fear, we’ve got the lowdown on properly laundering your blackout curtains. Follow our guide and your curtains will emerge clean, refreshed and still dark as night.
You can wash your blackout curtains by hand or by machine, depending on the type and condition of your curtain fabric. You need to use mild detergent, cold water, and gentle cycle or settings to wash your blackout curtains. You also need to avoid using bleach, fabric softener, or dryer sheets to wash your blackout curtains.
We’ll cover hand washing or machine washing based on your curtains’ fabric, as well as drying, ironing and storage tips tailored to blackout curtains.
So grab your detergent and let’s get to work revitalizing your light-blocking lifesavers! With the right technique, washing blackout curtains needn’t be a chore but rather a rejuvenating refresh. Your restorative rest and peace of mind depend on it.
Wash Your Blackout Curtains by Hand
One of the safest and easiest ways to wash your blackout curtains is to wash them by hand. Washing your blackout curtains by hand can prevent them from getting tangled, stretched, or torn in the machine. It can also prevent them from losing their color, shape, or blackout effect. Washing your blackout curtains by hand is especially recommended for delicate or fragile fabrics, such as silk, velvet, or lace.
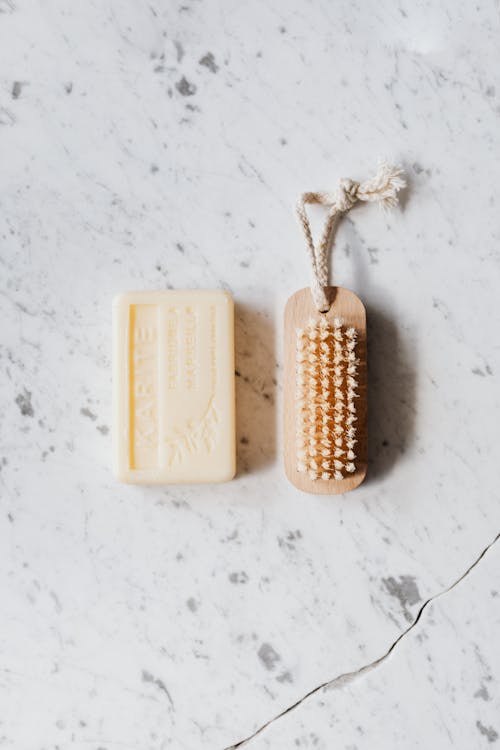
To wash your blackout curtains by hand, you need a mild detergent, cold water, a bucket or a bathtub, a soft brush or a sponge, and some towels. Here are some steps to follow:
- Start by checking the care label on your curtain fabric to see if it is suitable for hand washing. If it is not, you may need to take it to a professional cleaner or use another method.
- Next, remove your curtains from the rod or the hanger and shake them gently to remove any loose dust or dirt. You can also use a vacuum cleaner with a soft brush attachment to clean your curtains before washing them.
- Then, fill your bucket or bathtub with cold water and add some mild detergent. You can use a liquid or a powder detergent, but make sure it is free of bleach, chlorine, or optical brighteners. You can also use some vinegar or baking soda to help remove stains or odors from your curtains.
- After that, submerge your curtains in the water and detergent mixture and gently swirl them around. You can also use a soft brush or a sponge to scrub any stains or spots on your curtains. Be careful not to rub or wring your curtains too hard, as this can damage them or cause them to lose their blackout effect.
- Finally, rinse your curtains thoroughly with cold water until the water runs clear. You can also use some fabric conditioner to make your curtains softer and smoother. Be careful not to use fabric softener or dryer sheets, as they can leave a residue on your curtains that can reduce their blackout effect.
Wash Your Blackout Curtains by Machine

Another way to wash your blackout curtains is to wash them by machine. Washing your blackout curtains by machine can save you some time and effort compared to washing them by hand. It can also make your curtains cleaner and fresher than washing them by hand. Washing your blackout curtains by machine is especially recommended for sturdy or durable fabrics, such as cotton, polyester, or nylon.
To wash your blackout curtains by machine, you need a mild detergent, cold water, a washing machine, a laundry bag or a pillowcase, and some towels. Here are some steps to follow:
- Start by checking the care label on your curtain fabric to see if it is suitable for machine washing. If it is not, you may need to take it to a professional cleaner or use another method.
- Next, remove your curtains from the rod or the hanger and shake them gently to remove any loose dust or dirt. You can also use a vacuum cleaner with a soft brush attachment to clean your curtains before washing them.
- Then, place your curtains in a laundry bag or a pillowcase and zip or tie it closed. This will protect your curtains from getting snagged, stretched, or torn in the machine. You can also place some towels in the machine with your curtains to balance the load and prevent them from getting wrinkled.
- After that, load your machine with cold water and add some mild detergent. You can use a liquid or a powder detergent, but make sure it is free of bleach, chlorine, or optical brighteners. You can also use some vinegar or baking soda to help remove stains or odors from your curtains.
- Finally, set your machine on a gentle cycle and low spin speed and start the wash. Be careful not to use a hot cycle or high spin speed, as this can damage your curtains or cause them to lose their blackout effect.
Dry Your Blackout Curtains
The next step to wash your blackout curtains is to dry them. You need to dry your blackout curtains carefully and gently to prevent them from getting wrinkled, shrunken, or faded. You also need to dry them completely before hanging them back on the rod or the hanger.
There are two main ways to dry your blackout curtains: air drying or tumble drying. Each way has its own pros and cons and can affect the quality and appearance of your blackout curtains.
- Air drying: Air drying is the safest and easiest way to dry your blackout curtains. Air drying can prevent your curtains from getting overheated, overdried, or damaged in the dryer. It can also preserve their color, shape, and blackout effect. However, air drying can also take longer and require more space than tumble drying. It can also leave your curtains damp, wrinkled, or stiff if not done properly.
- Tumble drying: Tumble drying is another way to dry your blackout curtains. Tumble drying can save you some time and space compared to air drying. It can also make your curtains softer and smoother than air drying. However, tumble drying can also cause your curtains to get overheated, overdried, or damaged in the dryer. It can also cause them to lose their color, shape, or blackout effect if not done properly.
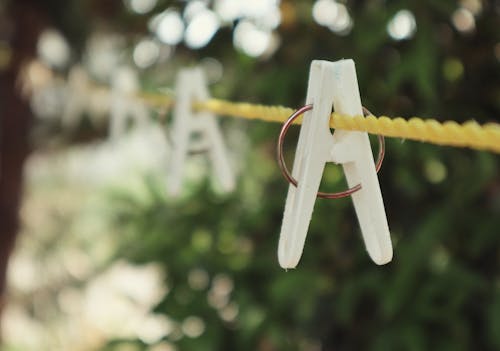
To air dry your blackout curtains, you need some clothespins or hangers and a clothesline or a drying rack. Here are some steps to follow:
- Start by squeezing out any excess water from your curtains gently and carefully. Be careful not to wring or twist your curtains too hard, as this can damage them or cause them to lose their blackout effect.
- Next, hang your curtains on the clothesline or the drying rack using some clothespins or hangers. Make sure to hang them in a shaded and well-ventilated area, away from direct sunlight, heat, or moisture. You can also hang them indoors or outdoors, depending on the weather and your preference.
- Then, let your curtains air dry completely before taking them down. You can also shake them or fluff them occasionally to speed up the drying process and prevent them from getting wrinkled or stiff.
To tumble dry your blackout curtains, you need a dryer and some towels or dryer balls. Here are some steps to follow:
- Start by squeezing out any excess water from your curtains gently and carefully. Be careful not to wring or twist your curtains too hard, as this can damage them or cause them to lose their blackout effect.
- Next, place your curtains in the dryer along with some towels or dryer balls. The towels or dryer balls will help absorb some moisture and reduce the static and friction in the dryer. They will also help fluff up your curtains and prevent them from getting wrinkled or tangled.
- Then, set your dryer on a low heat and low tumble setting and start the dry. Be careful not to use a high heat and high tumble setting, as this can damage your curtains or cause them to lose their blackout effect.
- Finally, take out your curtains when they are still slightly damp and not completely dry. This will prevent them from getting overdried or shrunken in the dryer.
Iron Your Blackout Curtains
The final step to wash your blackout curtains is to iron them. You need to iron your blackout curtains gently and carefully to remove any wrinkles or creases that may have formed during washing or drying. You also need to iron them before hanging them back on the rod or the hanger.
There are two main ways to iron your blackout curtains: using an iron or using a steamer. Each way has its own pros and cons and can affect the quality and appearance of your blackout curtains.
- Using an iron: An iron is a device that produces heat that you can apply to your curtains. Using an iron can make your curtains look more crisp and neat than using a steamer. It can also make your curtains easier to handle and hang than using a steamer. However, using an iron can also cause your curtains to get overheated, burned, or damaged if not done properly. It can also cause them to lose their color, shape, or blackout effect if not done properly.
- Using a steamer: A steamer is a device that produces steam that you can apply to your curtains. Using a steamer can make your curtains look more smooth and soft than using an iron. It can also make your curtains safer and gentler to iron than using an iron. However, using a steamer can also cause your curtains to get wet, damp, or moldy if not done properly. It can also cause them to lose their color, shape, or blackout effect if not done properly.
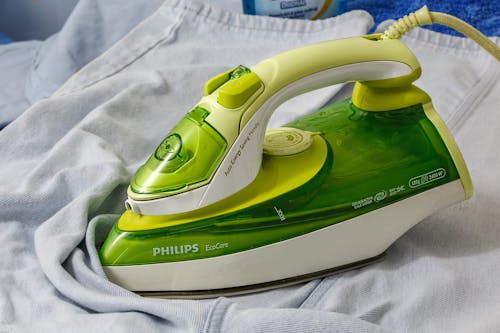
To iron your blackout curtains with an iron, you need an iron, an ironing board, a thin cloth or a towel, and some water. Here are some steps to follow:
- Start by setting your iron on a low heat setting and filling it with some water. You can also use some vinegar or baking soda in the water to help remove any stains or odors from your curtains.
- Next, lay your curtain flat on the ironing board and place a thin cloth or a towel over it. This will protect your curtain from getting burned or damaged by the iron.
- Then, iron your curtain gently and slowly, making sure not to press too hard or too long on one spot. You can also use the steam function on your iron if it has one to help smooth out any wrinkles or creases on your curtain.
- Finally, hang your curtain back on the rod or the hanger as soon as you finish ironing it. This will prevent it from getting wrinkled again.
- Start by filling your steamer with water and plugging it in. You can also use some vinegar or baking soda in the water to help remove any stains or odors from your curtains.
- Next, hang your curtain on the rod or the hanger and hold the steamer about six inches away from it. You can also use a soft brush or a sponge to scrub any stains or spots on your curtain.
- Then, steam your curtain gently and evenly, making sure to cover all the wrinkled or creased areas. You can also use your hand or a cloth to smooth out the fabric as you go.
- Finally, let your curtain air dry completely before taking it down. You can also shake it or fluff it occasionally to speed up the drying process and prevent it from getting stiff.
Store Your Blackout Curtains

The last step to wash your blackout curtains is to store them. You need to store your blackout curtains properly and carefully to prevent them from getting dirty, dusty, or damaged again. You also need to store them in a way that preserves their color, shape, and blackout effect.
There are two main ways to store your blackout curtains: hanging them or rolling them. Each way has its own pros and cons and can affect the quality and appearance of your blackout curtains.
- Hanging them: Hanging them is the best way to store your blackout curtains if you plan to use them again soon. Hanging them can prevent them from getting wrinkled, creased, or stretched. It can also preserve their color, shape, and blackout effect. However, hanging them can also take up more space and require more maintenance than rolling them. It can also expose them to more dust, light, or moisture than rolling them.
- Rolling them: Rolling them is another way to store your blackout curtains if you plan to store them for a long time. Rolling them can save you some space and make them easier to transport than hanging them. It can also protect them from more dust, light, or moisture than hanging them. However, rolling them can also cause them to get wrinkled, creased, or flattened. It can also cause them to lose their color, shape, or blackout effect if not done properly.
To hang your blackout curtains, you need some hangers and some tissue paper or plastic wrap. Here are some steps to follow:
- Start by folding your curtain in half lengthwise and placing it on a hanger. Make sure that the hanger can support the weight and width of your curtain.
- Next, cover your curtain with some tissue paper or plastic wrap to protect it from dust and moisture. You can also use some tape or clips to secure the paper or wrap around your curtain.
- Then, hang your curtain in a dry and cool place, away from direct sunlight, heat, or moisture. You can also hang it in a closet or a wardrobe for more protection.
To roll your blackout curtains, you need some cardboard tubes and some tissue paper or plastic wrap. Here are some steps to follow:
- Start by laying your curtain flat on a clean surface and placing a cardboard tube at one end of it. Make sure that the tube is longer than the width of your curtain.
- Next, roll your curtain around the tube tightly and evenly, making sure not to create any wrinkles or creases on your curtain.
- Then, cover your rolled curtain with some tissue paper or plastic wrap to protect it from dust and moisture. You can also use some tape or clips to secure the paper or wrap around your curtain.
- Finally, store your rolled curtain in a dry and cool place, away from direct sunlight, heat, or moisture. You can also store it in a box or a bag for more protection.
Wrapping Up
There you have it, the secrets to keeping your blackout curtains clean and cozy. While washing may seem an inconvenience, the benefits to your wellbeing and home decor make the effort worthwhile. Properly cared for blackout curtains will continue blocking light and noise for years of restful nights and stylish spaces.
Follow our hand washing, machine washing, drying, ironing and storage tips and your blackout curtains will emerge refreshed and re-energized. Avoid harsh chemicals, high heat and improper handling which damage curtains and diminish their light-blocking superpowers.
With the right technique and a little TLC, washing blackout curtains needn’t be a chore but a rejuvenating ritual. So give your blackout curtains some love and enjoy a clean slate. When life feels chaotic, draw those lush curtains and escape into your tranquil cocoon. Your rest, relaxation and décor will thank you for it! There’s nothing quite as rejuvenating as a serene space and sleeping soundly.
Turn your home into a haven and make pampering a priority. You deserve the gift of tranquility.
Dale is the colorful mind behind HuetifulHomes.com, where he shows you how to create a home that is as fun and fabulous as you are. He has a passion for color and a knack for DIY, with years of interior design experience he shares his tips and tricks on how to create a home that reflects your personality and style. He believes that color is the key to happiness, and he wants to help you make your home more Huetiful.