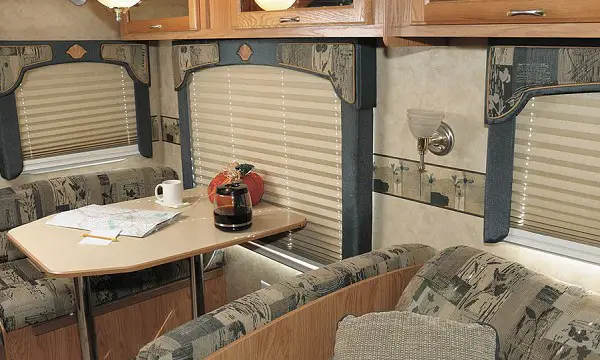
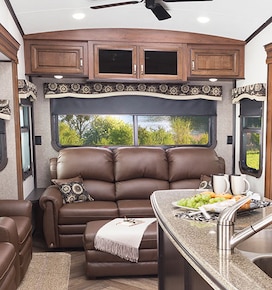
One of the best things about traveling in an RV is being able to enjoy the marvelous views from your windows. Whether you’re driving through the mountains, the desert, the forest, or the coast, you’ll always have something amazing to see. But to make the most of your RV windows, you need to have blinds that can give you some shade, privacy, and coziness when you need them.
Blinds are a type of window covering that can be raised and lowered with a cord or a motor. They can be made of various materials, such as fabric, wood, or metal. They can also have different designs, such as roller blinds, pleated blinds, roman blinds, or cellular blinds.
They are stylish, versatile, and easy to operate with a cord or a motor. But sometimes, they can get broken or damaged due to wear and tear, sun exposure, pets, kids, or accidents. If this happens, don’t panic. You don’t have to replace them or hire a professional to fix them. You can restring them yourself with some simple tools and steps. In this blog post, we’ll show you how to restring blinds in RV in six easy steps.
Follow these steps and you’ll have your blinds working like new in no time. And then you can go back to enjoying the scenic views from your RV windows. Happy blind-ing!?
To restring blinds in RV, you need to remove the broken shade, remove the end caps from the top and bottom rail, remove the cords from the blind, attach new cord to the spring(s) or slat(s) depending on the design, replace cord bushings if needed, re-string the blind by threading the cord through the holes or loops on the fabric depending on the design, position cords and replace rails, and reinstall retainer clips. This process may take some time and patience, but it will help you restore your blinds to their original function and appearance.
To restring blinds in RV, you will need:
The first step is to remove the broken shade from the window. To do this, you need to unscrew both tension cord retainers at the bottom of the blind from the wall. These are small plastic pieces that hold the cord in place and keep the blind taut. Then, unscrew one screw from each side of the top rail and slide it out from the brackets. Be careful not to damage the wall or the window frame as you remove the shade.
The next step is to remove the end caps from the top and bottom rail. The end caps are small plastic pieces that cover the ends of the rails and protect them from dust and dirt. To remove them, you need to use a screwdriver or a pair of pliers to pry them off gently. You may need to wiggle them slightly or tilt them slightly to release them from the rails.
The third step is to remove cords from blind. The cords are thin nylon strings that run through the holes or loops on the fabric depending on the design of your blind. They connect to springs or slats on each side of the top rail that allow you to raise and lower your blind. To remove them, you need to cut them with scissors or a knife near where they exit the end caps. Be careful not to cut yourself or damage the fabric as you do this.
The fourth step is to attach new cord to spring(s) or slat(s) depending on your blind design. You can find replacement cord online or in hardware stores that match your blind size and color. To attach new cord to spring(s) or slat(s), you need to tie one end of the cord to one of them on one side of the top rail with a knot. Then, thread it through all the holes or loops on the fabric until you reach the other side of the top rail. Tie it to another spring or slat on that side. Repeat this process for another cord if your blind has two cords.

The fifth step is to replace cord bushings if needed. Cord bushings are small plastic pieces that fit into holes on each end cap and guide the cords through them smoothly. They prevent the cords from fraying or getting stuck. To replace them, you need to insert new ones into each hole on each end cap. Make sure they fit snugly and securely.
the blind by threading the cord through the holes or loops on the fabric
The sixth step is to re-string the blind by threading the cord through the holes or loops on the fabric depending on your blind design. To do this, you need to use a wire restring tool if you have one or use your fingers if you don’t. A wire restring tool is a thin metal wire with a hook on one end that helps you push the cord through the holes or loops on the fabric. To use it, you need to hook one end of the cord to the wire and push it through the holes or loops until you reach the other end. Then, unhook the cord from the wire and repeat this process for another cord if your blind has two cords.

The seventh step is to position cords and replace rails by sliding them back into their brackets and end caps. To do this, you need to lay down your shade on a flat surface and make sure your cords are not twisted or tangled. Then, slide one end of your top rail into one bracket on your window frame or wall and secure it with a screw. Repeat this process for another end of your top rail and another bracket. Then, slide your bottom rail over your cords and make sure they cross in the middle. Replace the end caps on your bottom rail and thread the cords through the exit holes.
The final step is to reinstall retainer clips by screwing them back into the wall at the bottom of your blind. Retainer clips are small metal pieces that hold your cord in place and keep your blind taut. To reinstall them, you need to pull your cord down and hook it onto the clip. Then, screw the clip into the wall with a screwdriver or a drill. Repeat this process for another cord and another clip.

Q: How do I clean my blinds in RV?
A: To clean your blinds in RV, you can use a vacuum cleaner with an upholstery attachment or a soft brush to remove any dust or dirt. You can also use a damp cloth or sponge with some mild detergent to wipe down any stains or spots. Rinse them with clean water and let them dry completely before rehanging them.
Q: How do I install new blinds in RV?
A: To install new blinds in RV, you need to measure your window width and height, choose your mount type (inside mount or outside mount), mark your bracket positions, drill pilot holes and attach your brackets with screws, snap your top rail into your brackets, connect your cord or motor, attach your chain if applicable, and adjust your fabric alignment if needed.
Q: How do I fix a broken spring or motor on my blinds?
A: If your spring or motor on your blinds is broken or malfunctioning, you may need to replace it with a new one. You can find replacement springs or motors online or in hardware stores that match your blind type and size. To replace your spring or motor, you need to remove your blind from the window, remove the end caps from the top rail, disconnect the cord or motor from the spring or gear depending on the design, replace the spring or motor with a new one, connect the cord or motor to the spring or gear depending on the design, and rehang your blind on your window.
Restringing blinds in RV is a simple and easy way to fix your blinds without replacing them or spending too much money. You just need to follow these eight simple steps and use some basic tools. You will be amazed by how good your blinds look after you restring them.
If you enjoyed this DIY project, please share it with your friends and family. And don’t forget to check out our other home decor and lifestyle tips on our blog. We have plenty of ideas to help you make your RV more huetiful!

Dale is the colorful mind behind HuetifulHomes.com, where he shows you how to create a home that is as fun and fabulous as you are. He has a passion for color and a knack for DIY, with years of interior design experience he shares his tips and tricks on how to create a home that reflects your personality and style. He believes that color is the key to happiness, and he wants to help you make your home more Huetiful.

