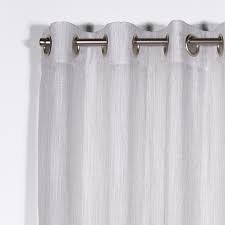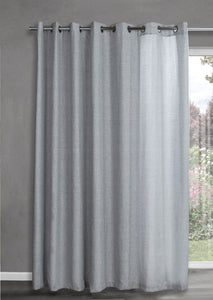
Do you want to give your windows a makeover with some stylish and easy-to-hang curtains? If so, you should try eyelet curtains. Eyelet curtains are curtains that have metal or plastic rings at the top, which slide over a rod or a wire.
They create a sleek and modern look for your windows, with neat and even pleats. And they are super easy to make and hang with curtain eyelet rings.
Curtain eyelet rings are metal or plastic rings that have a hole in the center, which allows them to slide over the rod or wire. They are attached to the top of the curtain, either by sewing them on or by using a special tool. In this blog post, I’ll show you how to use curtain eyelet rings and create stunning eyelet curtains for your home.
How to use curtain eyelet rings: Measure your window and rod, cut and hem your fabric, attach the eyelet rings to the curtain, and hang them on the rod.
The first step to use curtain eyelet rings is to measure your window and rod and decide how long and wide you want your curtains to be. Eyelet curtains usually cover the entire window, from the top of the rod to the floor or sill. However, you can also hang them higher or lower depending on your preference. To measure your window, use a tape measure or a ruler and measure the width and length of the window. Then add about 2 inches to the width and 4 inches to the length to allow for hems and overlaps. For example, if your window is 36 inches wide and 48 inches long, then you need a fabric that is 38 inches wide and 52 inches long.
To measure your rod, use a tape measure or a ruler and measure the length of the rod. Then add about 4 inches to each end to allow for overhangs. For example, if your rod is 60 inches long, then you need a fabric that is 68 inches wide.

The next step to use curtain eyelet rings is to cut and hem your fabric according to your measurements. You can use any type of fabric that suits your style and decor, such as cotton, linen, velvet, or blackout. However, avoid fabrics that are too thick or stiff, as they may not hang well with the eyelet rings. To cut your fabric, use a pair of scissors or a rotary cutter and a cutting mat. Mark your measurements on the fabric with a fabric marker or a pencil and cut along the lines.
To hem your fabric, fold over about 1 inch of fabric along each edge of the curtain and press it with an iron. Then fold over another inch of fabric and press it again. This will create a double-folded hem that hides the raw edges of the fabric. Then either stitch along the edge of the hem with a sewing machine or a needle and thread, or apply iron-on hem tape or fabric glue between the layers of fabric and press them together.
The third step to use curtain eyelet rings is to attach the eyelet rings to the top of the curtain. There are two ways to do this: by sewing them on or by using a special tool.
To sew them on, you need to mark where you want each eyelet ring to go on your curtain. You can use a tape measure or a ruler to space them evenly across the width of your curtain. For example, if you have 10 eyelet rings and your curtain is 68 inches wide, then you need to space them 6.8 inches apart. You can use a fabric marker or a pencil to mark where each ring should go on your curtain.
Then you need to cut out small holes in your fabric where each mark is. You can use a pair of scissors or a craft knife to do this. Make sure that each hole is slightly smaller than the diameter of your eyelet ring.
Then you need to sew each eyelet ring onto your fabric around each hole. You can use a needle and thread or a sewing machine for this. Start by going through the front of the ring, then sew around the inside edge of the ring until you reach where you started.
To use a special tool, you need to buy an eyelet ring attachment tool that matches the size of your eyelet rings. This tool consists of two parts: an anvil that holds one side of the ring in place, and a punch that snaps onto the other side of the ring.
To use this tool, you need to mark where you want each eyelet ring to go on your curtain as described above.
Then you need to cut out small holes in your fabric where each mark is as described above.
Then you need to place one side of each eyelet ring onto the anvil part of the tool, with the right side facing up.
Then you need to place your fabric over the ring, aligning it with the hole.
Then you need to place the other side of the ring onto the punch part of the tool, with the right side facing down.
Then you need to press the two parts of the tool together firmly, until you hear a click. This will snap the two sides of the ring together and secure it to the fabric.

The final step to use curtain eyelet rings is to hang them on the rod. To do this, simply slide each eyelet ring over the rod and adjust them as needed. Make sure that your rod is securely installed above your window with brackets or hooks.
Using curtain eyelet rings is a simple and elegant way to hang your curtains on a rod. You can use any type of fabric and any length of curtains that match your style and decor. All you need to do is measure your window and rod, cut and hem your fabric, attach the eyelet rings to the curtain, and hang them on the rod. By doing this, you can add some flair and sophistication to your home.

Dale is the colorful mind behind HuetifulHomes.com, where he shows you how to create a home that is as fun and fabulous as you are. He has a passion for color and a knack for DIY, with years of interior design experience he shares his tips and tricks on how to create a home that reflects your personality and style. He believes that color is the key to happiness, and he wants to help you make your home more Huetiful.